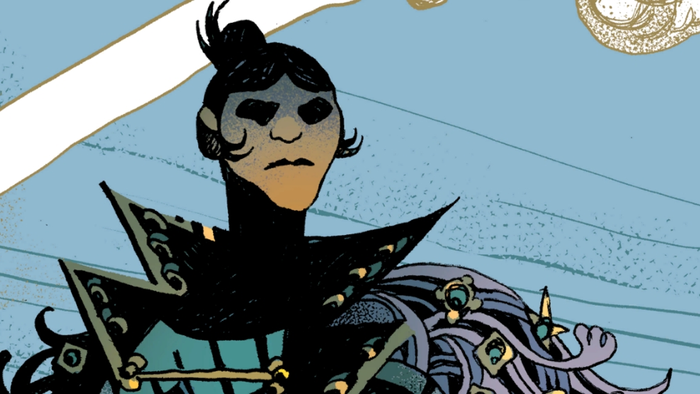
| |
| | ||||
![]() | ||||||
| | | |||||
|
GDC 2003: How to Build a Better Cutscene Cutscenes, in one form or another, have been a part of computer games from almost the beginning. There were the crude, pixelated animations of early arcade games, the live-action, bluescreen productions of PC games, and now the 3D animation of today's consoles. Purists like to say that cutscenes are a distraction, an unnecessary and annoying intrusion on the integrity of the game. Gameplay is king! And, even those who enjoy cutscenes would have to admit that there are times when they get too much of a good thing. Some games have so many cutscenes, or such long cutscenes, that you have to wonder whether the game designers had a movie in mind instead of a game. And then there are those games with such boring, confusing, ill-conceived cutscenes that it would have been better if they hadn't bothered making any cutscenes at all. When you leave the interactive world of the game and enter the cinematic world of the cutscene, the rules change. You depart the continuous, spontaneous world of on-the-fly camerawork, and enter the world of traditional cinematic structure. As someone who has worked in both the game industry (at LucasArts) and in the film industry, (at Pixar) I look at cutscenes in games with a keen awareness of cinematic design. Shot compositions, staging, cutting, pacing: every aspect of what is seen in the cutscene has expressive importance and is there, exactly the way it is, because someone decided that they should be. The rules by which these decisions are made are the rules of the language of film. Unfortunately, game cutscenes are often conceived in ignorance of the basic grammar of this language. And when you have a shaky grasp on the rules of grammar, it's hard to express yourself clearly. There are some very beautiful cutscenes out there, and there are lots of bad ones. What are the problems that I see?
There are lots of ways that cutscenes can go wrong. What follows are four fundamental steps that can help in creating cutscenes that go right.
Step 1: Know Your Purpose
The first step in making better cutscenes is being clear on what those purposes are.
The second step in producing better cutscenes is to do better planning. In this case, another name for "planning" is "previsualization". To understand how previsualization fits into the production pipeline, it's worth taking a moment to look at how the whole animation production process works. The Pixar Production Pipeline Cutscenes are made the same way that any animation is made. It doesn't matter whether the animation is being produced for a game of a cartoon, there is a certain order that things generally need to go. As an example of a basic model of animation production, I'd like to outline the way things worked at Pixar when I worked there on A Bug's Life, Toy Story 2, and Monsters Inc.
Notice that there are a lot of things that happen ahead of the animation step. To use a theatrical analogy, animation is the part of the process when the actors step onto the stage and perform. But before we have the performance, we need the rehearsals. In the animation pipeline, "previsualization" is the "rehearsal". Previsualization is where you can answer all the critical filmmaking questions. How should the action be staged? Where should the camera be positioned? How should the shot be composed? Will this sequence of shots really tell our story? Can we be more concise? Where should the cut happen? How's the pacing? With previsualization, the director can see the big picture and think clearly about the overall cinematic design. By focusing on the staging and cinematics before the character animation, he's able to isolate a dimension of production that really needs attention on it's own. Previsualization requires an expense of time and manpower that will take resources away from other areas of your project, so the question will inevitably arise, "Do we really need to do this?" The answer is "yes", and the reason is this: Animation is time consuming and expensive. On RTX Red Rock, we found that, on a good day, we could expect an animator to produce one second of animation per hour. That's eight seconds per day, or 40 seconds per animator per week. (At Pixar, by the way, the weekly average per animator is about 12 seconds.) The previsualization techniques I will outline are fast and cheap by comparison. In the amount of time it takes for an animator to animate one shot, a layout artist will work through a whole sequence of shots. It makes sense to work from the fastest and cheapest, to the slowest and most expensive means of representing the story. Working out all the cinematic issues before animation starts avoids a lot of wasted effort later on. Waiting for a shot to be animated before realizing that it should really be cut, wastes a lot more time than realizing it should be cut during the previsualization phase of production.
Three Previsualization Techniques I will focus on three previsualization techniques that go beyond storyboards for planning your animation. Two of them, the "Animatic" and "Layout", are both part of the Pixar production pipeline. The other is the "Videomatic", which is a technique borrowed from ILM. 1. The Animatic Storyboards and the Animatic are the first step in making the script visible. They're also the fastest and cheapest way of representing your story visually. Storyboards represent the fundamental actions of each scene: what each character is doing and feeling, and how they are relating to what's around them. The main limitation of the storyboard is that it doesn't give you a very good idea of pacing. How long will the scene really run? In order to find out, it helps to turn the storyboards into an animatic. The animatic is created by scanning each storyboard panel into the computer, importing it into a digital editing system and cutting the sequence together in sync with a scratch dialog track. Music and sound effects are often added as well. The value of the animatic is to give you a better idea of how well the shots cut together, how long your scene is going to run, and if it is going to be entertaining at that pace. 2. The Breakdown Meeting With the animatic put together, it's time for a breakdown meeting. A breakdown meeting is a meeting of all the individuals and departments that will have responsibility for producing the cutscene. At the meeting, everyone watches the animatic and then has an opportunity to ask questions and raise concerns. By the end of the meeting, everyone should have a clear idea of what will be expected of them, and will have bought off on the plan. This meeting is a critical part of the production process because it is at this point that the wheels of production are really set in motion. Giving everyone involved a chance to express their concerns and affect the way in which the shots are designed (within reason) can avoid a lot of extra work, not to mention resentment, down the road. Normally the breakdown meeting happens after the animatic is complete. But, it is also possible to have a breakdown meeting centered around a videomatic. 3. The Videomatic It's not realistic to think that you can work out all the details of staging in the storyboards, or even in the Animatic. Storyboards tend to emphasize the characters attitudes and actions rather than the precise composition of each shot. The gap between the 2D world of storyboards and the 3D world of animation leaves too much room for miscalculation when you're trying to understand how a shot is actually going to look. Layout and the Videomatic, because they happen in 3D worlds, allow you to more precisely visualize how a shot is really going to work. Camera angle, camera movement, shot size, lens choice---all of these decisions strongly affect the dramatic impact of the scene. With both Layout and the Videomatic, you have the opportunity to test these choices before investing valuable animation time. Layout and the Videomatic directly address the two fundamental questions that face any film director: where will the camera be placed, and how will the characters move in front of the camera? A videomatic is a live action film shot with a video camera. Videomatics are quick, and a lot of fun to make. To create one, it isn't necessary to get real actors or create special environments; you can shoot it with your team members as actors and your offices as sets. The Bounty Hunter videomatic was staged in the LucasArts office building with members of the production team. The Director of Animation acted as the film director, making the crucial decisions about camera placement and character blocking. After all the footage was recorded, shots were trimmed and cut together on a digital editing system. The result was a narrative sequence that had each shot and shot length timed out. The Bounty Team was able to get a clear idea of how long each sequence needed to be, what shots were going to work and in what sequence they should unfold. Layout Whether you approach the layout stage with a videomatic in hand or not, the layout process cannot be skipped. In addition to being a previsualization technique, layout is also the first step in the actual production of a shot. In order to get started in layout, you need a script, storyboards, character models, voice, and a 3D set. In layout, character blocking is done in the simplest way to tell the story. The objective is to set the fundamental marks in the scene that the animator needs to hit, and to get the character movement timed out as closely as possible. While the look of the character blocking is primitive, the marks that are hit for things like head turns, starting and stopping walks, arm or hand gestures etc. are timed very precisely. The idea is that when the shot finally moves from Layout to Animation, the basic parameters will have been set for the animator to work within. Whereas the character blocking in layout looks crude, the camera work is taken to a high level of precision. Camera angle, lens, shot width (close up, medium shot, wide shot), camera movement etc., are carefully considered. After Layout, when the shot goes to Animation, the camera is off limits to the animator. It's the animator's job to try to conform to the camera work and shot lengths that are set in Layout. If for some reason he can't, then camera changes must be requested by the animator, and the shot sent back to Layout. The idea is to try and nail down the cinematic structure of a whole sequence in Layout and not have the timing and rhythm of that structure broken later on. As each shot is built, the connections between the shots are worked out. As I mentioned, it's often the case that, once the layout artist begins to put together the shots that seemed to work so well in the storyboards, the reality of the 3D world doesn't match the imaginative world of the storyboard. At this point, adjustments have to be made. Sometime shots are cut. Sometimes shots are added. Sometimes one shot is married to another shot by means of a camera move. Sometimes the staging of the whole scene needs to be reworked. It is rare when the layout artist is simply able to match how things look in the storyboards. With each build of a sequence in Layout, the director takes a look and gives his feedback. The scene is then reworked and revisions are made until all the shots flow together easily and the timing of the scene is perfected. At that point each shot file is sent on to Animation. It is important to feel confident in that your layout works, because once a sequence goes to Animation, the cost of revisions goes way up. ______________________________________________________
|
||||||||||||||||||||||||||||||||||||
|
|